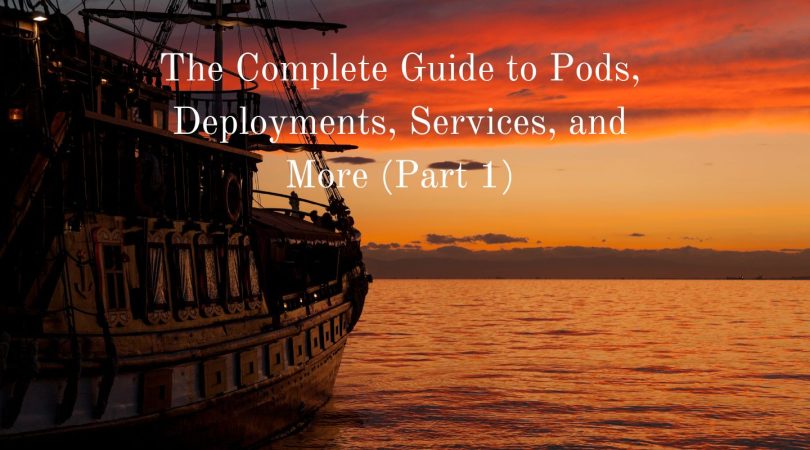
Welcome to the first part of my guide to using Kubernetes CLI commands to manage your cluster. In this part, I will focus on providing a complete overview of how to work with pods, deployments, services, and more using the Kubernetes CLI. This guide is the first part of a three-part series, so make sure to follow along for the next two parts, where we will dive deeper into other Kubernetes resources and advanced techniques. Whether you’re new to Kubernetes or a seasoned user, this guide will equip you with the knowledge and skills to manage your cluster efficiently using the CLI.
The examples provided here are just a portion of the many imperative commands available.
My intention is to introduce you to this type of command so that you can effectively communicate with Kubernetes in a fast manner.
So, let’s get started and explore the power of Kubernetes CLI together!
Remember this:
By default, the kubectl edit command would launch either vi for Linux or notepad on Windows when editing a resource.
However, you have the option to modify this behavior by updating the KUBE_EDITOR variable’s value. For instance, if you prefer using the nano editor to edit your resources, you can execute a similar command:
KUBE_EDITOR="nano" kubectl edit -f nginx.yamlPods
Create a Pod named my-pod with a container running nginx:
kubectl run my-pod --image=nginxDelete a Pod named my-pod:
kubectl delete pod my-podGet the logs from a Pod named my-pod:
kubectl logs my-podGet information about a Pod named my-pod:
kubectl describe pod my-podCreate a Pod from a YAML file named my-pod.yaml:
kubectl create -f my-pod.yamlUpdate the image of the container in a Pod named my-pod:
kubectl set image pod my-pod nginx=nginx:latestRestart a Pod named my-pod:
kubectl rollout restart pod my-podGet the IP address of a Pod named my-pod:
kubectl get pod my-pod -o=jsonpath='{.status.podIP}'Scale a deployment named my-deployment to 3 replicas:
kubectl scale deployment my-deployment --replicas=3Check the status of a Pod named my-pod:
kubectl get pod my-podForward traffic from a local port 8080 to a container port 80 in a Pod named my-pod:
kubectl port-forward my-pod 8080:80Update the environment variables in a Pod named my-pod:
kubectl set env pod my-pod MY_ENV_VAR=my-valueOf course, you will replace my-pod with the desired Pod name. Also, these commands assume that you have the necessary permissions to perform these actions.
Be careful when deleting Pods as it may cause disruption to the application running in the Pod.
Some of these commands also assume the existence of certain Kubernetes objects like a deployment or a container.
Always ensure that the necessary objects have been created before using these commands.
Deployment
Create a Deployment:
kubectl create deployment nginx --image=nginx:latest --replicas=3Update the image of a Deployment:
kubectl set image deployment/nginx nginx=nginx:1.23.3Scale a Deployment:
kubectl scale deployment nginx --replicas=5Rollback to the previous version of a Deployment:
kubectl rollout undo deployment/nginxCheck the status of a Deployment:
kubectl rollout status deployment/nginxPause a Deployment:
kubectl rollout pause deployment/nginxResume a paused Deployment:
kubectl rollout resume deployment/nginxExpose a Deployment as a Service:
kubectl expose deployment nginx --port=80 --target-port=80 --type=LoadBalancerDelete a Deployment:
kubectl delete deployment nginxEdit a Deployment:
kubectl edit deployment nginxThis command will open the deployment definition in your default text editor (vim or nano), allowing you to make any necessary changes to the deployment’s specifications.
Once you’ve made your changes, save and close the file to apply the changes to the deployment.
Note that when you edit a deployment, the existing pods will be terminated and replaced with new ones that match the updated deployment specification.
Therefore, it’s important to carefully consider the impact of any changes you make to a deployment before applying them.
Services
Create a Service with NodePort type:
kubectl create service nodeport my-service --tcp=80:8080Update a Service to use a different port:
kubectl edit service my-serviceUpdate the spec.ports field to use a different port number.
Scale a Service:
kubectl scale deployment/my-deployment --replicas=3Expose a Service:
kubectl expose deployment/my-deployment --type=LoadBalancer --port=80 --target-port=8080Delete a Service:
kubectl delete service my-serviceAnnotate a Service:
kubectl annotate service my-service description="My service description"Set the selector for a Service:
kubectl patch service my-service -p '{"spec":{"selector":{"app":"my-app"}}}'Change the Service type to ClusterIP:
kubectl patch service my-service -p '{"spec":{"type":"ClusterIP"}}'Change the Service type to LoadBalancer:
kubectl patch service my-service -p '{"spec":{"type":"LoadBalancer"}}'Update the Service IP address:
kubectl patch service my-service -p '{"spec":{"clusterIP":"10.0.0.1"}}'ConfigMaps
Create a ConfigMap from a file:
kubectl create configmap my-configmap --from-file=my-file.propertiesCreate a ConfigMap from a literal value:
kubectl create configmap my-configmap --from-literal=key1=value1 --from-literal=key2=value2Edit a ConfigMap:
kubectl edit configmap my-configmapDelete a ConfigMap:
kubectl delete configmap my-configmapView the details of a ConfigMap:
kubectl describe configmap my-configmapView the contents of a ConfigMap:
kubectl get configmap my-configmap -o yamlCreate a Pod that uses a ConfigMap:
kubectl run my-pod --image=my-image --env-file=my-configmap.propertiesIn the above example, the ConfigMap is mounted as a file and the environment variables are read from that file.
Update the data in a ConfigMap:
kubectl create configmap my-configmap --from-file=my-file.properties --dry-run=client -o yaml | kubectl apply -f -So in this example, the ConfigMap is updated using the dry-run flag and the YAML output is piped to the apply command.
Rollback to a previous version of a ConfigMap:
kubectl rollout undo configmap/my-configmapHere we have a ConfigMap rolled back to the previous version.
Roles
Create a Role named my-role in namespace my-namespace with permission to list pods:
kubectl create role my-role --verb=list --resource=pods -n my-namespaceCreate a Role named my-role in namespace my-namespace with permission to get deployments:
kubectl create role my-role --verb=get --resource=deployments -n my-namespaceUpdate a Role named my-role in namespace my-namespace to include the permission to delete services:
kubectl patch role my-role -n my-namespace --type='json' -p='[{"op": "add", "path": "/rules/-", "value": {"verbs":["delete"],"apiGroups":[""],"resources":["services"]}}]'Delete a Role named my-role in namespace my-namespace:
kubectl delete role my-role -n my-namespaceCreate a Role named my-role in namespace my-namespace with permissions to list and get pods:
kubectl create role my-role --verb=list,get --resource=pods -n my-namespaceUpdate a Role named my-role in namespace my-namespace to include the permission to update deployments:
kubectl patch role my-role -n my-namespace --type='json' -p='[{"op": "add", "path": "/rules/-", "value": {"verbs":["update"],"apiGroups":["apps"],"resources":["deployments"],"resourceNames":["my-deployment"]}}]'Create a Role named my-role in namespace my-namespace with permission to create and delete config maps:
kubectl create role my-role --verb=create,delete --resource=configmaps -n my-namespaceUpdate a Role named my-role in namespace my-namespace to remove permission to delete pods:
kubectl patch role my-role -n my-namespace --type='json' -p='[{"op": "remove", "path": "/rules/0/verbs/1"}]'Please note that the above commands assume that there are no existing policies in place that may conflict with the permissions granted by the Roles.
Always review your cluster’s security policies before creating or modifying Roles.
Role Bindings
Create a RoleBinding with the “editor” Role for the “default” ServiceAccount in the “kube-system” namespace:
kubectl create rolebinding default-editor --clusterrole=edit --serviceaccount=kube-system:default --namespace=kube-systemUpdate the RoleBinding named “edit-binding” in the “default” namespace to use the “admin” ClusterRole:
kubectl patch rolebinding edit-binding -p '{"roleRef": {"name": "admin"}}'Delete the RoleBinding named “view-binding” in the “kube-system” namespace:
kubectl delete rolebinding view-binding --namespace=kube-systemGet a piece of detailed information about the RoleBinding named “admin-binding” in the “default” namespace:
kubectl describe rolebinding admin-binding --namespace=defaultCreate a RoleBinding with the “view” Role for the “view-user” ServiceAccount in the “my-namespace” namespace:
kubectl create rolebinding view-binding --clusterrole=view --serviceaccount=my-namespace:view-user --namespace=my-namespaceAdd a user with the name “Luka” to an existing RoleBinding named “admin-binding” in the “default” namespace:
kubectl patch rolebinding admin-binding --namespace=default --type=json -p='[{"op": "add", "path": "/subjects/-", "value": {"kind": "User", "name": "luka", "apiGroup": null}}]'To list all RoleBindings in the “kube-system” namespace:
kubectl get rolebindings --namespace=kube-systemEdit the RoleBinding named “view-binding” in the “default” namespace to add a new subject with the name “Jelena”, use the following command:
kubectl edit rolebinding view-binding --namespace=defaultCreate a RoleBinding with the “admin” Role for a specific User with the name “admin-user”.
kubectl create rolebinding admin-binding --clusterrole=admin --user=admin-userUpdate the RoleBinding named “edit-binding” in the “default” namespace to remove a specific subject with the name “alice”:
kubectl patch rolebinding edit-binding --namespace=default --type=json -p='[{"op": "remove", "path": "/subjects/1"}]'Network Policies
Create a new NetworkPolicy named “allow-nginx” that allows traffic to pods with the label “app=nginx” on port 80.
kubectl create networkpolicy allow-nginx --from-pod-selector=app=nginx --pod-selector= --policy-types=ingress --ingress=[{"ports": [{"port": 80, "protocol": "TCP"}]}]Update an existing NetworkPolicy named “allow-mysql” to deny traffic to pods with the label “app=mysql” on port 3306:
kubectl patch networkpolicy allow-mysql --type=json -p='[{"op": "add", "path": "/spec/policyTypes", "value": ["ingress", "egress"]}, {"op": "add", "path": "/spec/ingress/0/from/podSelector/matchLabels", "value": {"app": "mysql"}}, {"op": "add", "path": "/spec/ingress/0/ports/0/port", "value": 3306}, {"op": "add", "path": "/spec/ingress/0/ports/0/protocol", "value": "TCP"}, {"op": "add", "path": "/spec/egress", "value": []}]'Delete a NetworkPolicy named “deny-all” in the “default” namespace:
kubectl delete networkpolicy deny-all --namespace=defaultGet detailed information about a NetworkPolicy named “allow-web” in the “frontend” namespace:
kubectl describe networkpolicy allow-web --namespace=frontendCreate a new NetworkPolicy that allows traffic from a specific IP address to pods with the label “app=api” on port 8080:
kubectl create networkpolicy allow-ip --from=[{"ipBlock": {"cidr": "192.168.0.1/32"}}] --pod-selector=app=api --policy-types=ingress --ingress=[{"ports": [{"port": 8080, "protocol": "TCP"}]}]List all NetworkPolicies in the “backend” namespace:
kubectl get networkpolicies --namespace=backendEdit an existing NetworkPolicy named “allow-db” to allow traffic from pods with the label “app=frontend” on port 5432:
kubectl edit networkpolicy allow-dbUpdate an existing NetworkPolicy named “allow-internal” in the “internal” namespace to allow traffic between pods with the label “app=backend”.
kubectl patch networkpolicy allow-internal --namespace=internal --type=json -p='[{"op": "add", "path": "/spec/podSelector/matchLabels", "value": {"app": "backend"}}, {"op": "add", "path": "/spec/ingress/0/from/podSelector/matchLabels", "value": {"app": "backend"}}]'Create a new NetworkPolicy that allows traffic from pods with the label “app=web” to pods with the label “app=db” on port 3306.
kubectl create networkpolicy allow-db --from-pod-selector=app=web --to-pod-selector=app=db --policy-types=ingress --ingress=[{"ports": [{"port": 3306, "protocol": "TCP"}]}]Delete all NetworkPolicies in the “kube-system” namespace.
kubectl delete networkpolicies --namespace=kube-systemEvents
Get all events in the “default” namespace.
kubectl get events --namespace=defaultGet all events related to a specific object, such as a Pod named “nginx”.
kubectl describe pod nginx | grep -i eventsGet a summary of all events in the cluster.
kubectl get eventsFilter events by a specific reason.
kubectl get events --field-selector reason=FailedSchedulingCreate a new event for a specific object, such as a Pod named “api”:
kubectl annotate pod api kubernetes.io/events="{\"message\": \"Failed to start container\", \"reason\": \"ContainerFailed\"}"Delete all events in the “kube-system” namespace:
kubectl delete events --namespace=kube-systemWatch events in real-time for the “default” namespace:
kubectl get events --namespace=default --watchThis will continuously update the terminal with any new events that occur in the namespace.
Filter events by a specific object, such as a Deployment named “web-deploy”:
kubectl get events --field-selector involvedObject.name=web-deployThis will show only the events that are related to the “web-deploy” object.
To filter events by a specific type, such as a Warning.
kubectl get events --field-selector type=WarningThis will show only the events that have a type of Warning.
Create a new event with a custom message:
kubectl create event --namespace=default --from=api --reason=ContainerFailed --type=Warning --message="Container failed to start"This will create a new event with the specified message and metadata.
Namespaces
Create a new namespace named “prod”:
kubectl create namespace prodGet all namespaces in the cluster:
kubectl get namespacesDelete a namespace named “test”:
kubectl delete namespace testSet the “prod” namespace as the default namespace for subsequent kubectl commands:
kubectl config set-context --current --namespace=prodAdd the label “environment=dev” to the “default” namespace:
kubectl label namespace default environment=devGet all pods in the “prod” namespace:
kubectl get pods --namespace=prodUpdate the resource quota of the “default” namespace to limit CPU usage to 2 cores:
kubectl patch namespace default --patch '{"spec":{"finalizers":null},"metadata":{"annotations":{"kubectl.kubernetes.io/last-applied-configuration":"{\"apiVersion\":\"v1\",\"kind\":\"Namespace\",\"metadata\":{\"annotations\":{},\"name\":\"default\"},\"spec\":{\"finalizers\":[\"kubernetes\"]}}\n"},"name":"default"}}' -p '{"spec":{"resourceQuota":{"hard":{"limits.cpu":"2"}}}}'Stateful Sets
Create a new StatefulSet named “web” from a YAML file:
kubectl apply -f web-statefulset.yamlGet information about the “web” StatefulSet.
kubectl describe statefulset webScale the number of replicas of the “web” StatefulSet to 3:
kubectl scale statefulset web --replicas=3Update the image used by the containers in the “web” StatefulSet:
kubectl set image statefulset web web-container=new-image:tagDelete the “web” StatefulSet:
kubectl delete statefulset webForce delete the “web” StatefulSet without waiting for the pods to gracefully terminate:
kubectl delete statefulset web --cascade=falseUpdate the partition for the “web” StatefulSet to update only the second and third replicas:
kubectl patch statefulset web -p '{"spec":{"updateStrategy":{"rollingUpdate":{"partition":2}}}}'Jobs
Create a new Job named “my-job” from a YAML file:
kubectl apply -f my-job.yamlGet information about the “my-job” Job:
kubectl describe job my-jobGet the logs for the first container in the first pod of the “my-job” Job:
kubectl logs my-job-0 -c container-1Delete the “my-job” Job:
kubectl delete job my-jobRestart the “my-job” Job:
kubectl rollout restart job my-jobCreate a new Job named “my-job” and run it immediately.
kubectl run my-job --image=my-image --restart=Never --dry-run=client -o yaml | kubectl apply -f -Get the status of the “my-job” Job:
kubectl get job my-job -o=jsonpath='{.status.conditions[?(@.type=="Complete")].status}'Create a Job named “my-job” and run it immediately, and then wait for it to complete:
kubectl run my-job --image=my-image --restart=Never --wait -- /bin/sh -c "echo Hello, Kubernetes!"View the pod’s logs from a Job named “my-job”:
kubectl logs -f my-job-0Create a Job named “my-job” with a time limit of 10 seconds and a backoff limit of 5:
kubectl run my-job --image=my-image --restart=OnFailure --backoff-limit=5 --command -- /bin/sh -c "sleep 10; echo Job complete"Update the image used by the containers in a Job named “my-job”:
kubectl set image job my-job my-container=my-image:tagDelete all completed Jobs:
kubectl delete jobs --field-selector=status.successful=1Cron Jobs
Create a new Cron Job named “my-cronjob” from a YAML file:
kubectl apply -f my-cronjob.yamlGet information about the “my-cronjob” Cron Job:
kubectl describe cronjob my-cronjobGet the logs for the first container in the first pod of the latest run of the “my-cronjob” Cron Job:
kubectl logs $(kubectl get pods --selector=job-name=my-cronjob --output=jsonpath='{.items[-1:].metadata.name}') -c container-1Delete the “my-cronjob” Cron Job:
kubectl delete cronjob my-cronjobUpdate the image used by the containers in a Cron Job named “my-cronjob”:
kubectl set image cronjob my-cronjob my-container=my-image:tagCreate a new Cron Job named “my-cronjob” and run it immediately:
kubectl create cronjob my-cronjob --image=my-image --schedule="*/1 * * * *" --dry-run=client -o yaml | kubectl apply -f -Update the schedule for a Cron Job named “my-cronjob” to run every hour:
kubectl patch cronjob my-cronjob -p '{"spec":{"schedule":"0 * * * *"}}'Temporarily stop a Cron Job named “my-cronjob”:
kubectl patch cronjob my-cronjob -p '{"spec":{"suspend":true}}'Resume a suspended Cron Job named “my-cronjob”:
kubectl patch cronjob my-cronjob -p '{"spec":{"suspend":false}}'Run a specific Cron Job manually:
kubectl create job --from=cronjob/my-cronjob my-cronjob-manual-run